Tutorial
Table of contents
- Introduction
- Download the data
- Create a variant catalog from assemblies
- Genotype calling
- Accessing the results
- Annotating variant effects with SnpEff
Introduction
This quick tutorial will guide you through your first use of MALVIRUS, showing you how to create an index of known variants and how to call variants for an individual, directly from the sequencing dataset.
First, we will need the reference genome of the species we want to analyze, some additional assemblies that differ from the reference genome, and some data to analyze.
Download the data
We will use data from SARS-CoV-2.
The data you will need for this tutorial is conveniently available at this GitHub repo; either download the data as a ZIP file on your PC or clone the repository using git:
git clone https://github.com/algolab/MALVIRUS-tutorial-data
The data include the complete genome of SARS-CoV-2 isolate Wuhan-Hu-1 (accession id: NC_045512.2) in file reference.fasta, its annotation in file sars-cov-2.gff, a set of SARS-CoV-2 complete genomes in file seqs.fasta, and an Illumina sequencing dataset of SARS-CoV-2 Malaysia using the ARTIC v1 protocol (SRA accession id: SRR11514750) in file SRR11514750.fastq.gz.
Create a variant catalog from assemblies
Notice: this step is for demonstration purposes only, as a SARS-CoV-2 catalog computed from GenBank assemblies is preloaded with MALVIRUS. First we will create a catalog of known variants induced by the assemblies we downloaded.
Head to the “Reference VCF” tab and click on the “Build a new Reference VCF from genomes” button.
You will be presented with a submission form similar to the following:
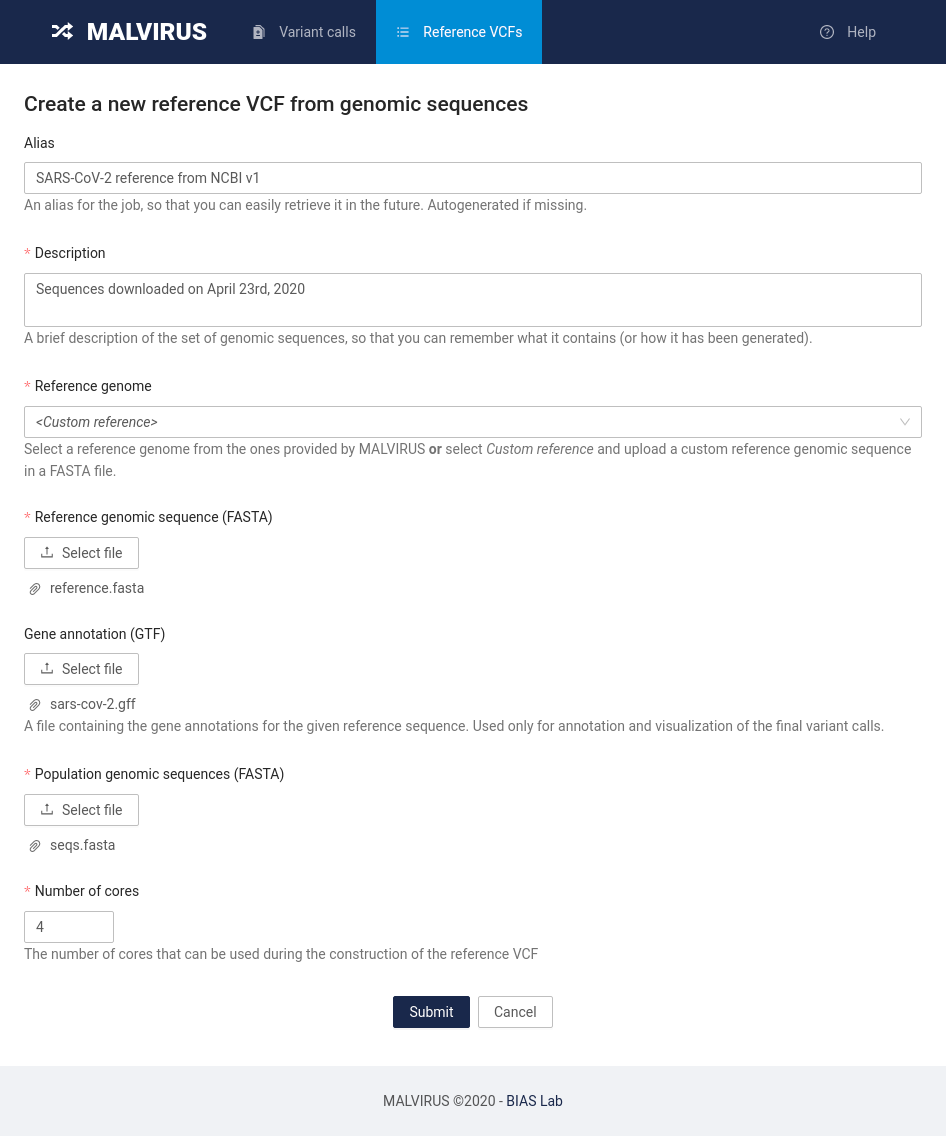
Fill in the information as follows:
- Alias: SARS-CoV-2 reference from NCBI v1
- Description: Sequences downloaded on April 23rd, 2020
- Reference genome: select the Custom reference item
- Reference genomic sequence: click the Select file button and select the
reference.fastafile in the git repository we cloned previously - Gene annotation: click on the Select file button and select the
sars-cov-2.gfffile in the git repository we cloned previously - Population genomic sequences: click on the Select file button and select the
seqs.fastafile in the git repository we cloned previously - Number of cores: set this value based on how many cores are available on your machine; setting this value to 4 is usually enough.
Once you filled in all the field with the data, click on the Submit button at the bottom of the page. You will be redirected to a page reporting the status of the job requested.
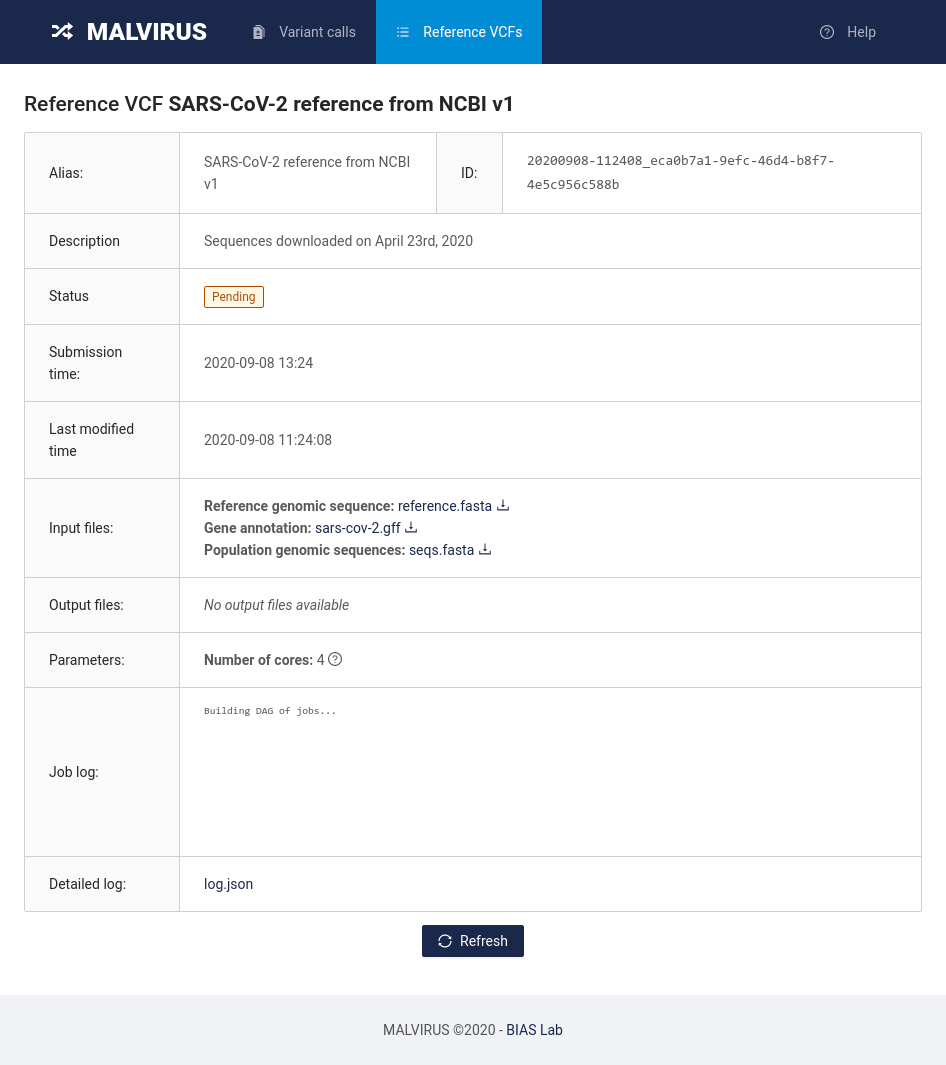
To update the status, click on the Refresh button at the bottom of the page. The status will change from “Pending” to “Running” to “Completed”. Once the status is “Completed”, congratulations! You just built your first MALVIRUS index. Let’s now head to genotyping the individual by clicking on the “Variant calls” tab at the top of the page.
Genotype calling
Head to the “Variant calls” tab and click on the “Perform a new variant call” button.
You will be presented with a submission form similar to the following:
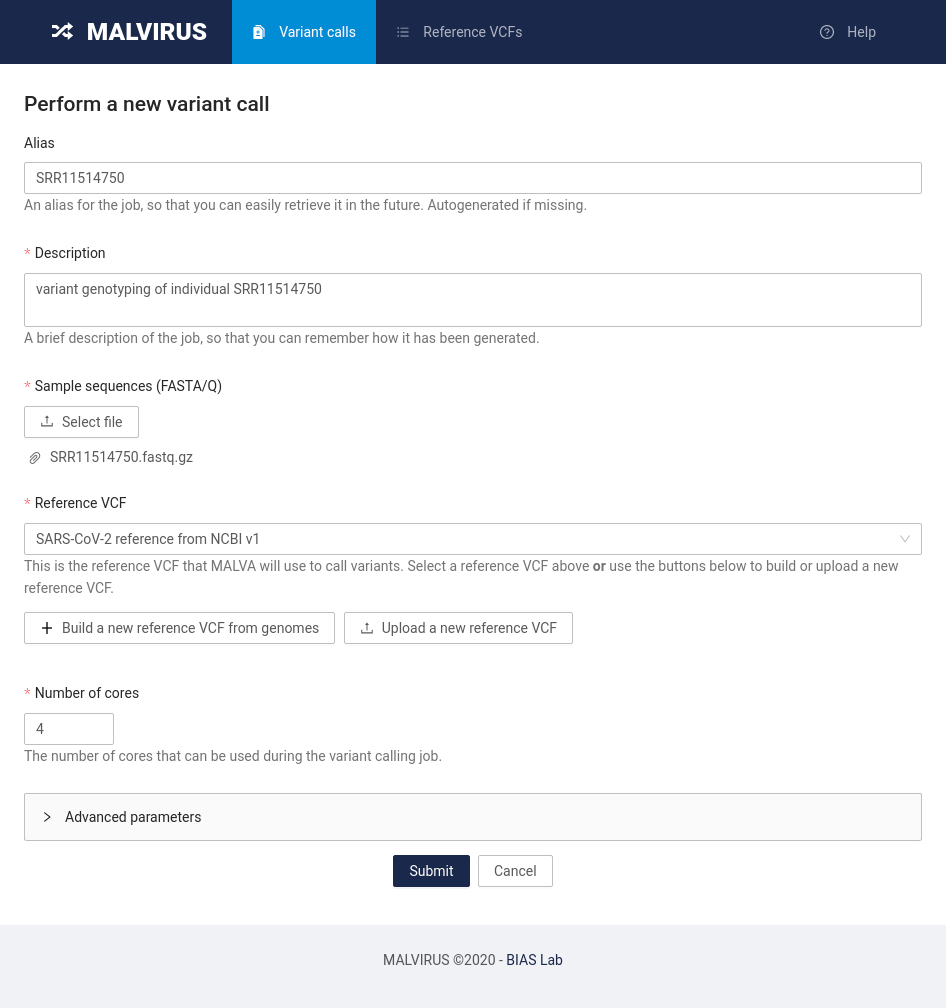
Fill in the information as follows:
- Alias: SRR11514750
- Description: variant genotyping of individual SRR11514750
- Sample sequences (FASTA/Q): click on the Select file button and select the
SRR11514750.fastq.gzfile - Reference VCF: click on the bar and select the “SARS-CoV-2 reference from NCBI v1” entry
- Number of cores: set this value based on how many cores are available on your machine; setting this value to 4 is usually enough
Other parameters are available in the “Advanced parameters” section. We will use the default values and will not change them for now.
Finally, click the Submit button at the bottom of the page.
Similarly to the previous step, you will be redirected to a page reporting the status of the job requested. To update the status, click on the Refresh button at the bottom of the page. The status will change from “Pending” to “Running” to “Completed”. Once the status is “Completed”, congratulations! You just completed your first genotype calling using MALVIRUS.
Accessing the results
To access the results, head back to the “Variant calls” tab where you will find the list of jobs submitted to MALVIRUS. You will be presented with a table containing a single entry (SRR11514750).
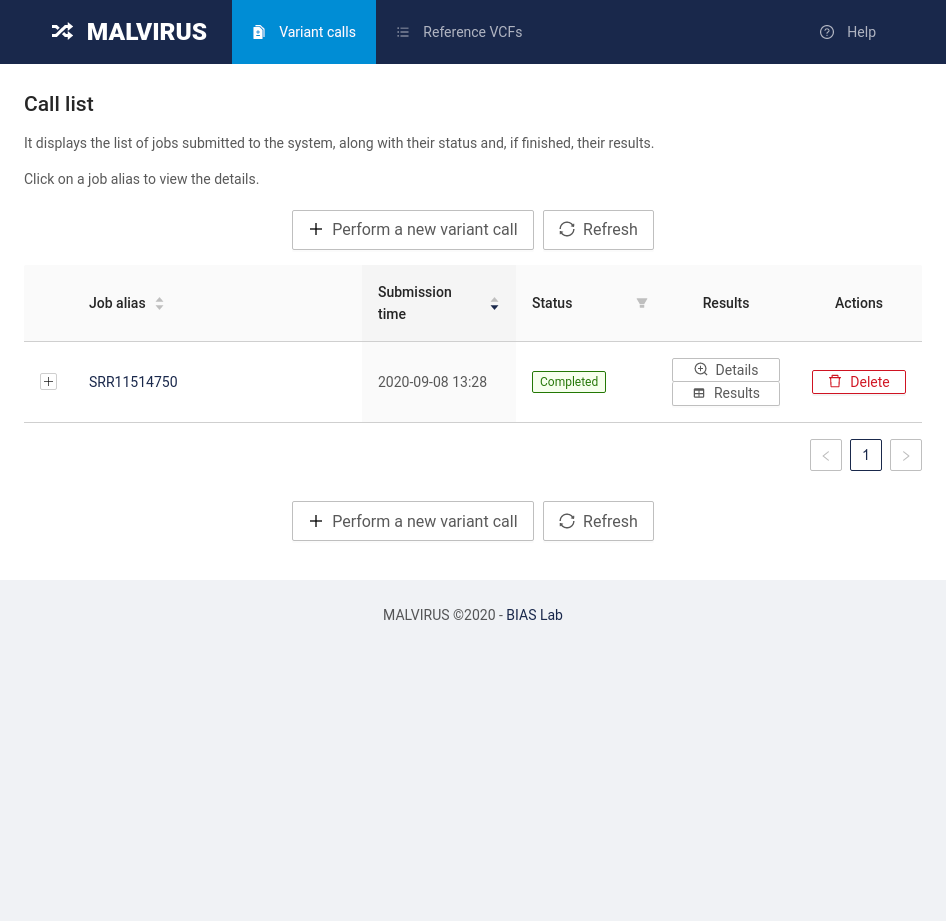
By clicking on the job alias you will be redirected to the job status page.
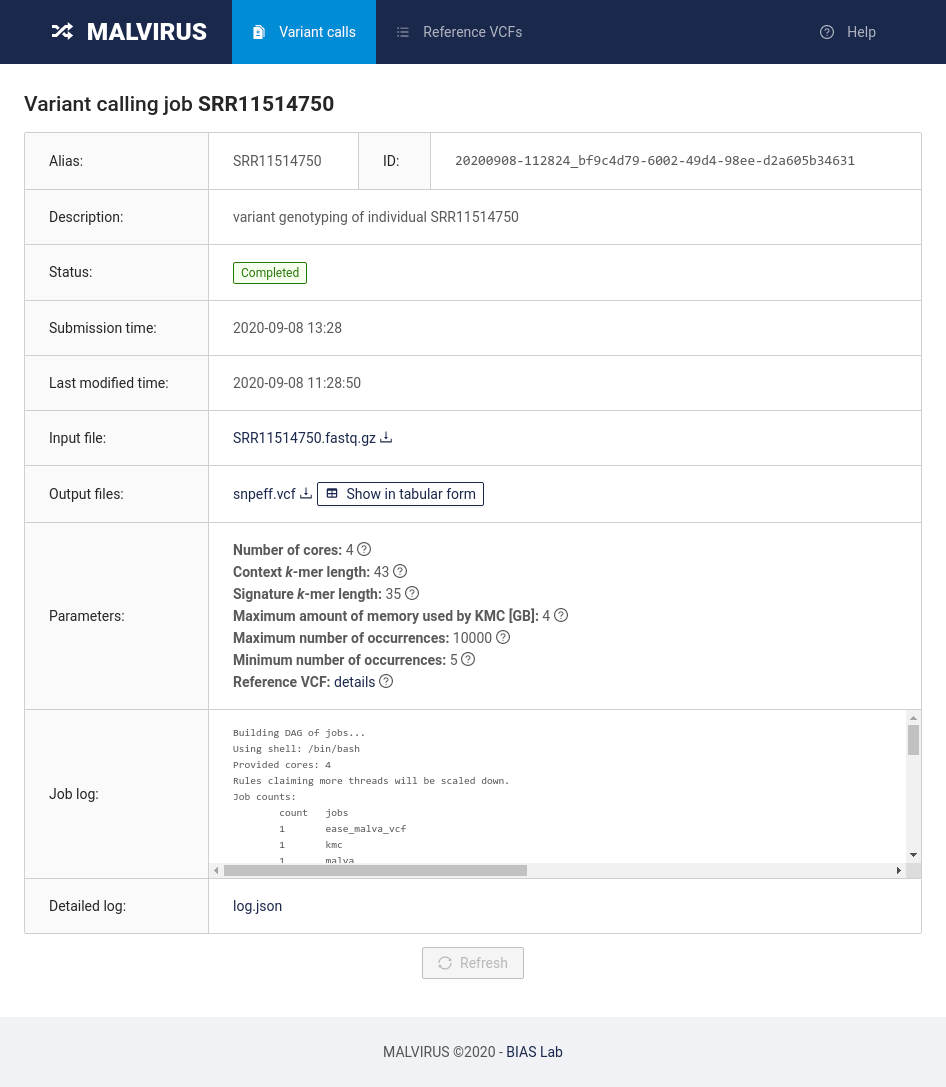
In this page you will be able to access the results by clicking on the Show in tabular form button in the “Output files” row.
By default the table in this view will only show the variants genotyped as wild type, by deselecting the “Show only loci with alt. allele” filter you will be able to analyze all the variants genotyped in this run.
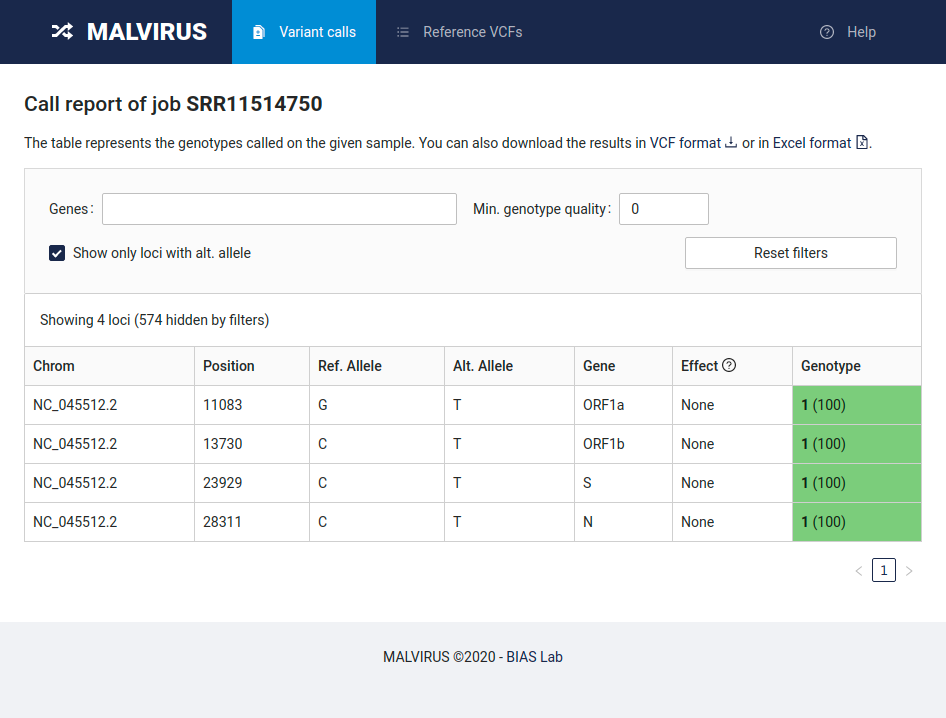
Finally, you can download the data both as VCF and in Excel format by clicking the links at the top of the page.
Annotating variant effects with SnpEff
MALVIRUS is able to annotate variant effects using SnpEff if a preloaded reference is used. So, you must re-create the variant catalog as described in Create a variant catalog from assemblies but selecting the item “NC_045512.2” in the Reference genome box instead of “Custom reference” (beware, the Alias must be different). This also saves us from uploading the reference genomic sequence in FASTA format and the related gene annotation.
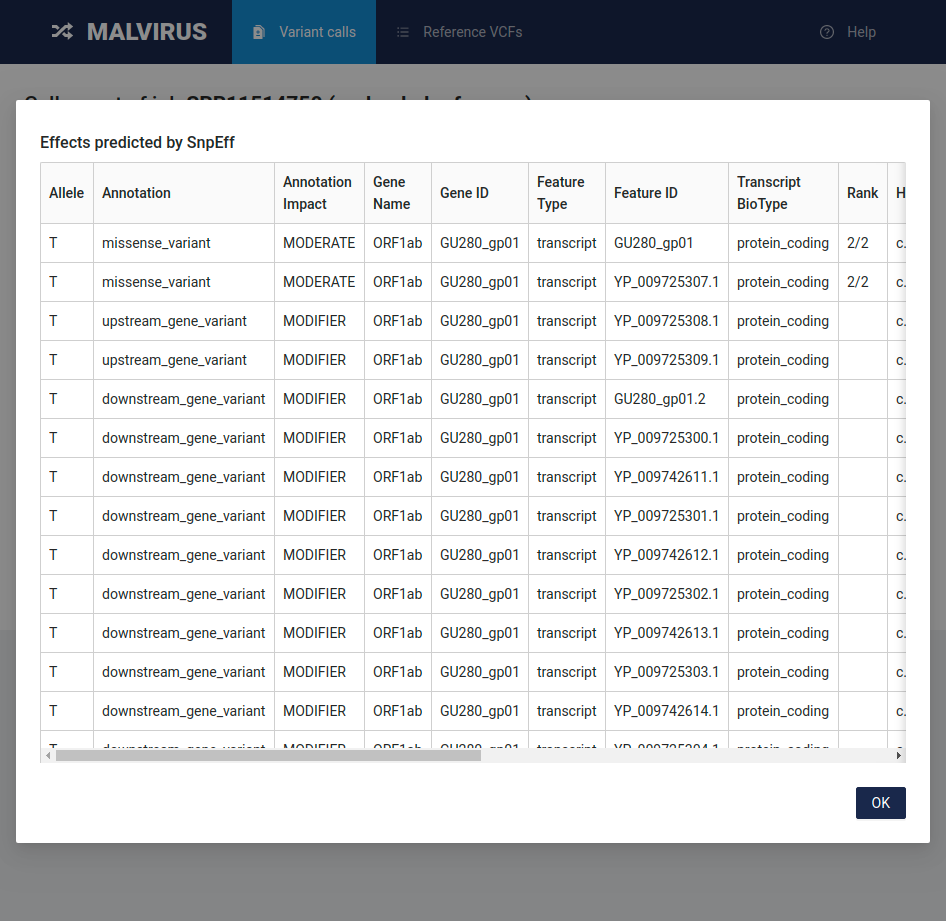
Then, if you genotype the individual SRR11514750 as described above but selecting the newly created catalog you will obtain a table similar to the following one.
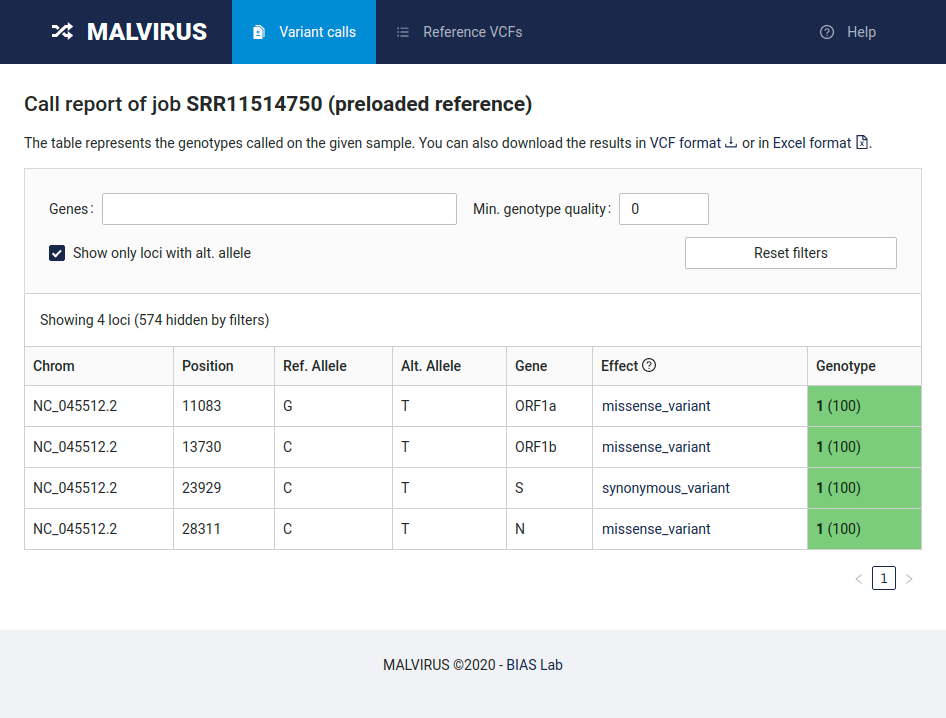
By clicking on a variant effect, you’ll see the full output of SnpEff for that variant in a tabular form.